
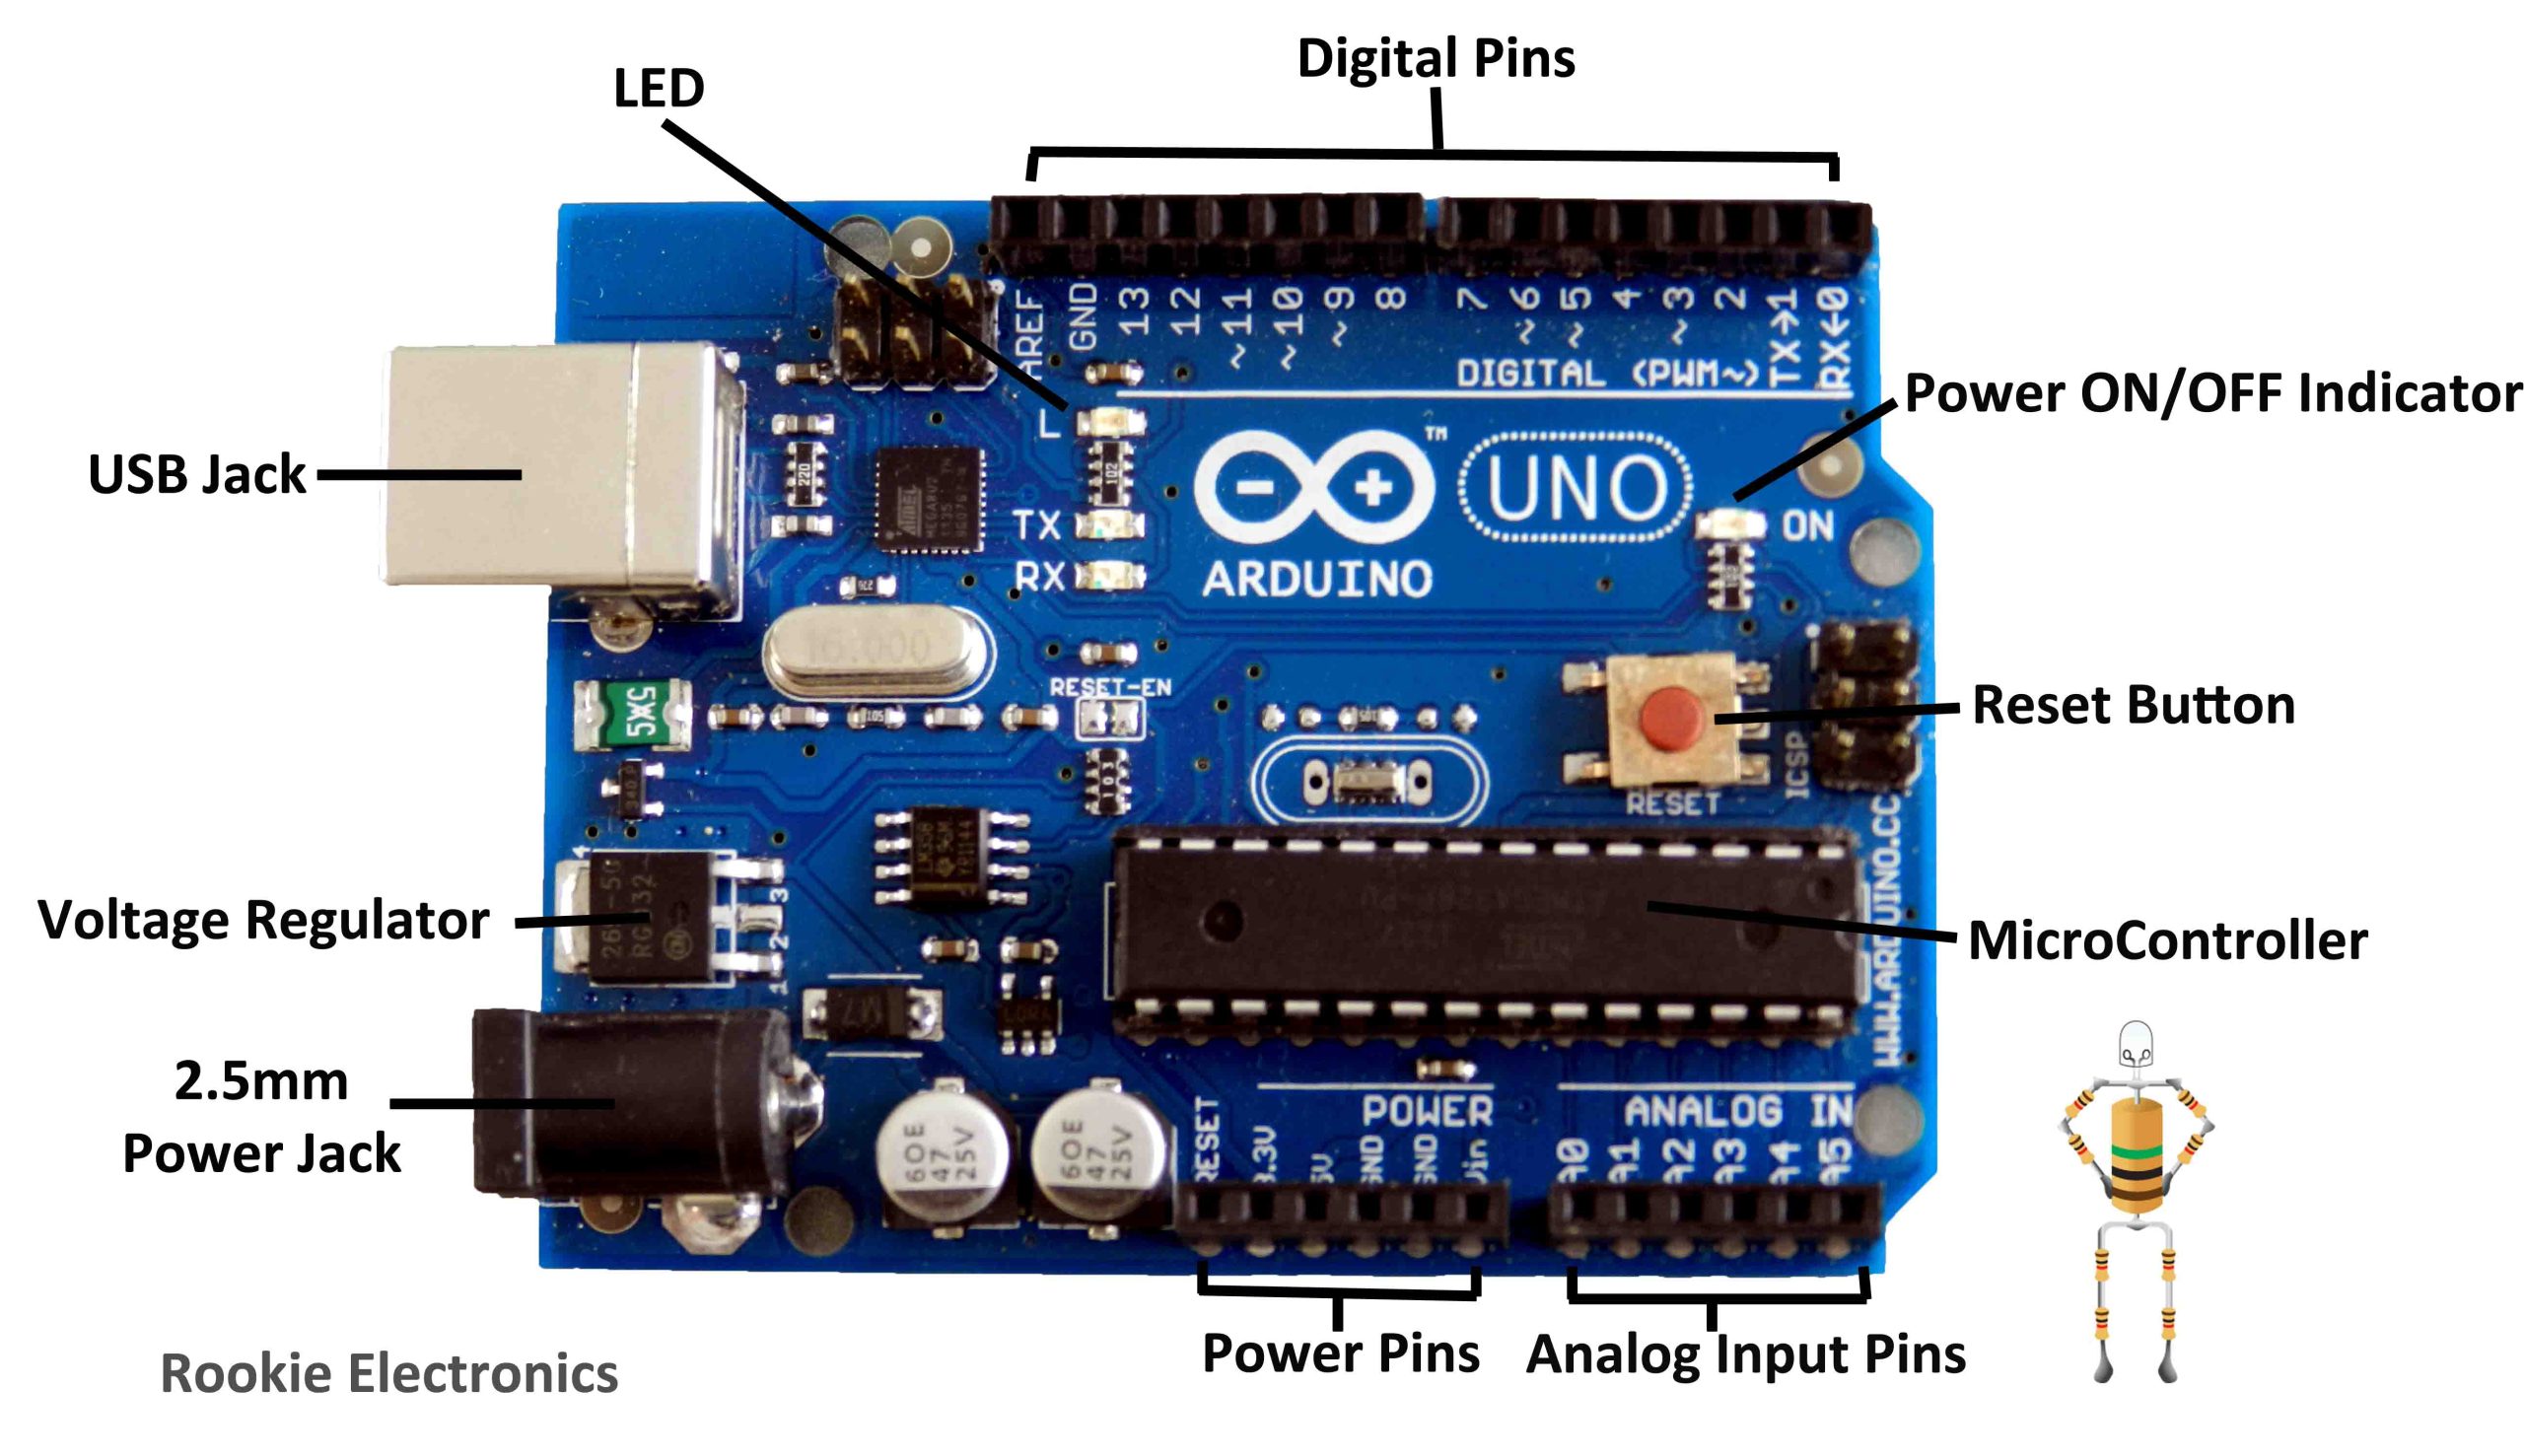
Arduino is the most famous micro-controller among hobbyists and students around the world. Most importantly it is an open source physical computing platform which is based on a small single-board micro-controller and a software for your computer to make programs, download to this board and run them. Best thing about this micro-controller is that you can Either make your own Arduino or purchase a pre-assembled one. At this stage we will be discussing about a pre-assembled one.
How to Program it ?
This video will guide you from the scratch. If you have never programmed an Arduino, dont worry. You are at the right place! **SIGH** To program it you need a USB cable & Arduino software, which you can find on http://arduino.cc/hu/Main/Software Download it, Install it and then Watch this video It comes with various examples of already programmed projects, I personally learned it the same way, opened the programs, went through them made changes and got an idea how does that work, its simple. Well, Once you have writen your program, upload it. and your good to go Details on Physical Components
Digital Pins: Digital pins can be used as input/output pins, we use the command pinMode() to configure them to either input or output function e.g pinMode(13, OUTPUT) OR pinMode(13, INPUT)
Power ON/OFF Indicator: This is simply an LED to show that the Arduino is powered or not.
Micro Controller: ATmega328 is the micro-controller, it is like the heart of arduino. It is actually the IC where our program is stored. It has the flash memory of 32KBs. It has 14 Digital I/O pins and 6 of them provide PWM.
Reset Button: Micro Controllerit resets the micro-controller, (Restart the Program)
Analog Inputs: It is 6 Analog Input Pins (A0 – A5), each of them provide 10 bit resolution that means 1024 different values.
Power Pins: These pins have 5v and GNDs pins where we can manually give Voltage Regulator to supply 5V to Arduino to operate it. (See How)
USB Jack: This jack is used to connect your Arduino with computer’s arduino enviroment, and Program it.
Power Jack: In this jack you put 2.2mm jack and can supply 7V-12V, We add 9V Battery.. But more than 12V can damage the Voltage regulator.
LED: This is built in LED which can be used to show outputs.
Where to get it ?
You can make your own arduino, you can get it’s schematic & list of parts and assemble it with your hand. There is a wonderful work done on making your own arduino by my great school friend, the one i was always inspired when it came to computers “Asad Memon”, hit this link: The Robotronics